How to play Last Bastion
Everything from your first turret to your first tournament payout. Ten minutes here will save your Core a hundred times over.
Quick start — your first run
- Sign in with OMEN (one tap — no password, no seed phrase) and hit PLAY. Your first campaign mission is free, like every campaign mission after it.
- The Omen Core is the glowing heart at the center. Rift forces breach from the purple gates and march down the corrupted lanes toward it. If the Core's HP hits zero, the run ends.
- Pick a turret from the COMMAND dock (or press 1–5) and click open plating between lanes to build it. Shift-click places several in a row.
- Press SPACE (or LAUNCH) to send the wave. Kills pay Salvage ◈; cleared waves pay Energy ⚡ for more construction.
- Every few waves you'll draft one of three upgrades — exact stat changes shown on each card. This is where runs are won.
- Survive, expand, adapt. When the run ends you bank Shards ◇ for permanent upgrades — every run pays, win or lose.
Reading the battlefield
The Bastion is a ringed fortress. Enemies path inward along lanes; you build in the plating between them. The wave strip along the top previews exactly what's coming next — armor, speed, fliers, bosses — so you can rebuild your line before it's tested.
Know your enemy. Rift Grunts soak, Stingers sprint, Bulwarks shrug off damage with heavy armor, Splitters burst into Shards when killed, Wardens regenerate, Wraiths fly, Menders heal everything around them — and the RIFT COLOSSUS is a wave all by itself. Armor reduces most damage but the Rift Lance ignores it entirely.
The five turrets
Every turret upgrades through six Mk levels (damage ×1.6 per level) and supports three targeting modes — first (default), strongest, and closest. Tap a placed turret to upgrade, retarget, or salvage it.
PULSE TURRET
Rapid single-target fire. Your economy pick — cheap enough to be everywhere.


BLAST MORTAR
Slow, lobbed splash hits. Devastating into slowed or clumped waves.

GRAVITY WELL
No damage — slows everything in range by 40%. Multiplies every other tower.
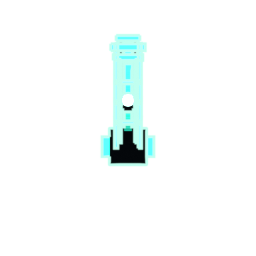
RIFT LANCE
Piercing line shot that ignores armor — hits everything along its path.

DRONE HANGAR
Launches homing interceptors — insurance against fliers and leakers.
Enemy compendium
Baseline stats — competitive profiles scale HP and speed by difficulty and by how deep your Bastion has expanded (outer rings breed tougher, faster enemies). Armor reduces every hit by that fraction, so big single hits beat rapid chip against armored targets. Flying enemies ignore ground layouts — keep tracking coverage inside.
| ENEMY | HP | SPD | ARMOR | TYPE | ABILITY | WEAK TO | PUNISHES |
|---|---|---|---|---|---|---|---|
| Rift Grunt | 42 | 60 | — | Ground | None — steady advance in numbers | Pulse (cheap efficient chip), any AoE | Nothing — dies to everything, wins by volume |
| Stinger | 24 | 115 | — | Ground | Very fast assault runner | Gravity slow + Pulse; Drones intercept | Slow-firing Blast often whiffs; slips past busy chokes |
| Shard | 14 | 92 | — | Ground | Tiny, fast chaff | Any splash; Pulse sweeps | Leaks while your towers chew a tank |
| Bulwark | 220 | 32 | 50% | Ground | Heavy armor plating | Blast & Rift (big hits punch through armor) | Pulse chip is halved; Gravity is wasted (already slow) |
| Splitter | 110 | 48 | — | Ground | Splits into 4 Shards on death | Blast AoE — kills the split too | Single-target towers get swarmed by the burst |
| Rift Warden | 160 | 42 | 25% | Ground | Regenerates 6 HP/s | Focused fire — Drone lock or Rift burst to out-damage the regen | Slow drip damage heals right back |
| Wraith | 90 | 55 | — | FLYING | Flies over ground chokepoints | Pulse & Drone tracking; place coverage on inner rings | Ground-choke strategies — it skips them |
| Mender | 130 | 40 | — | Ground | Heals nearby enemies 8 HP/s (radius 80) | KILL FIRST — Rift snipe or Drone focus | Ignoring it makes Bulwark packs nearly unkillable |
| Bulwark Prime | 250 | 30 | 50% | Ground | 120 shield, regenerates 4/s | Sustained Blast/Rift to break the shield before it regrows | Intermittent chip never gets through shield + armor |
| Phaser | 85 | 65 | — | Ground | Phases untargetable every ~6s | Burst damage in its visible window (Blast timing) | Slow-firing towers waste shots into the phase |
| Disruptor | 140 | 50 | 15% | Ground | Disables towers in radius 60 for 2s (every ~5s) | Kill at range before it reaches your cluster — Rift excels | Letting it park inside your turret nest |
| Splitter Prime | 200 | 45 | 10% | Ground | Splits into 3 Splitters — which split again | Layered AoE; Gravity to hold the cascade in the kill zone | One escapes ≈ 12+ Shards later |
| Rift Weaver | 300 | 30 | 30% | Ground | Summons 3 Shards every ~7s | Priority focus (Drone lock); AoE handles the chaff | Endless spawns screen everything behind it |
| Juggernaut | 520 | 26→62 | 35% | Ground · TIER 2 | Momentum — speed climbs every second it goes unhit (up to +140%); ANY hit resets it | Constant chip — Pulse / Drone lock keep it pinned at walking pace | Slow-firing burst builds: between Blast shells it sprints |
| Leech | 70 | 70 | — | Ground · TIER 2 | Drain — siphons 2 Energy ⚡ from YOU every second it lives | Kill priority at the gate — it is fragile; Rift snipe, Pulse sweep | Letting three of them stroll — that is your next turret gone |
| Iron Herald | 210 | 38 | 20% | Ground · TIER 2 | Iron Aura — every ally within 90px carries +30% armor while it lives | Lance ignores armor entirely; armor-break drafts; or drop the Herald first | Pulse-only lines — an escorted Bulwark pack becomes a wall |
| Adaptive Husk | 260 | 40 | 10% | Ground · TIER 2 | Adaptive plating — every hit from a turret class adds +5% resistance to THAT class (cap 65%) | Mixed lanes — spread the damage across classes; spells never adapt | Mono-turret builds: by hit 12 your whole line is doing a third of its damage |
| Riftborn | 120 | 58 | — | Ground · TIER 2 | Rift Tear — its death tears a 60px zone open for 6s; allies crossing it move +45% faster | Kill it FAR from the Core, or inside a Gravity field that eats the boost | Killing it at your last choke — everything behind it sprints the gap |
| Rift Anchor | 340 | 34 | 25% | Ground · TIER 2 | Unstoppable — immune to every slow and stun (Gravity, Time Dilation, draft stuns) | Raw damage only — Blast and Lance along the whole route | Control-heavy builds that rely on holding things in one kill zone |
| RIFT COLOSSUS | 2400 | 20 | 35% | Ground · BOSS | Massive — 30 Core damage on breach | Everything + spells; Gravity stalls it in range | Outlasting you — it does not stop |
Rule of thumb: Pulse for cheap chip & chaff, Blast for armor & splitters, Gravity to hold fast runners in the kill zone, Rift for priority snipes, Drone for locked focus fire and fliers. Kill Menders and Disruptors before the tanks they escort. Tier 2 (scored windows from Sept 7, Campaign from Mission 161): the Juggernaut wants constant chip, the Leech wants priority, the Herald wants Lance, the Husk wants a MIXED line, the Riftborn wants to die far from your Core, and the Anchor wants raw damage — no single build answers all six.
Map hazards — the battlefield fights back
Some battlefields carry a hazard: a feature of the ground itself, announced in the mission briefing and pinned to the HUD for the whole run. In the Campaign about half of the missions past Mission 10 roll one from their seed (never on onboarding, sector-core boss missions or the last five). In Ranked each weekly season carries one hazard for the whole week, set by the server alongside the weekly modifier — everyone in the season plays the same one. Tournaments and the War never have hazards: paid arenas stay pure standard.
| HAZARD | WHAT IT DOES | HOW TO PLAY IT |
|---|---|---|
| ≋ Rift Current | A ring band (between two of rings II–V) where enemies move +35% faster. | Kill before the band, not inside it. A choke sitting in the Current is a choke that leaks. Gravity fields just outside the band hold enemies where your damage lives. |
| ☁ Ion Fog | A ring band where turrets standing inside it lose 25% range. | Build on either side of the fog, never in it — a Lance on the far edge still reaches across. Turrets already inside it are not destroyed, only shortened; salvage and move them if the band blocks your coverage. |
| ⚡ Rift Storm | Every ~12 seconds of live wave time lightning marks a random occupied pad (shrinking rings), then strikes 2s later: that turret is silenced for 1.5s. | Spread your damage — a line that depends on one Blast Mortar loses that mortar at the worst moment. The build phase between waves is safe; the storm only fires while enemies are on the field. |
Band hazards are drawn as a tinted ring on the battlefield with dashed edges, labelled. The HUD pill shows the active hazard all run; hover it for the rule.
Battle spells
Equip three spells per run (competitive runs choose them at run start) and cast with Q W E or the spell bar. Every cast costs Energy ⚡ — there are no free spells — so a cast is always a trade against construction. Each spell has six upgrade levels.
OVERCHARGE
+50% damage to all turrets for 8s (scales to +100% for 15s).
CHAIN LIGHTNING
60 damage strike, arcing to 4 nearby (scales to 160 dmg, 7 arcs).
RIFT VORTEX
Pull + slow enemies in a 150px zone (scales to 250px, 90% slow).
AEGIS BARRIER
+60 Core shield instantly (scales to +220).
NANO REPAIR
Restore +30 Core HP (scales to +120).
TIME DILATION
Freeze ALL enemies for 3s (scales to 6s + lingering slow).
Drafts — where runs are won
Every few waves — and after elites, bosses and ring unlocks — the run pauses and deals you three upgrade cards; you keep one. Cards show exact stat changes before you pick: turret damage, fire rate, range, Core armor, Energy income, spell power and rarer hybrid effects.
Draft strategy beats tower spam. Committing to a theme (everything Explosive, or everything slow-and-pierce) compounds: three synergized picks outperform five scattered ones. The Draft Intelligence perk raises the odds of rare cards appearing at all.
Expanding the Bastion
When you can afford it, EXPAND THE BASTION. Each new ring pushes enemy spawn gates farther from the Core, opens fresh buildable plating, and introduces one new pathing mechanic. Your old towers become the hardened inner line — expansion is how a good run becomes a deep one.
The five currencies
Every purchase in the game shows separate buttons per currency — the game only ever spends the one you tap. There is no automatic switching, ever.
| CURRENCY | EARNED / SOURCED | SPENT ON | PERSISTS? |
|---|---|---|---|
| ⚡ Energy | Clearing waves in-run | Turrets, upgrades, rings, spell casts | No — resets each run |
| ◈ Salvage | Kills and waves in-run | Tactical supplies, rerolls, repairs | No — resets each run |
| ◇ Shards | Every run, free, win or lose | Permanent upgrades (free lane) | Yes |
 OMEN | Your live OMEN wallet | Tournament entries, packs, and the Standard lanes in the Perk Lab & Doctrine | Yes — real balance |
is your real balance, read live from your authenticated OMEN account. The game never simulates it, and top-ups happen on the OMEN platform — never inside the game.The Tower Arsenal — twenty permanent levels per platform
The Arsenal is the first permanent track most commanders should deepen. Five platforms, twenty permanent levels each. A level is bought once and is yours from that moment — it applies in every mode: Campaign, Ranked Campaign, Tournaments, Leagues and the Monthly War.
Arsenal levels are not drafts
A draft lasts one run and vanishes when the run ends. An Arsenal level never has to be re-earned. If you have ever finished a strong run and wished you could keep the build, the Arsenal is the part of the game that lets you keep a piece of it.
Spell Loadout
A separate station with the same shape: you equip three of eight combat spells before a run and that trio is what you take in. Tournaments and the Monthly War work differently — they use run-scoped spells, starting at LV 1 with whatever you upgrade during the run itself, so nobody arrives with a pre-built advantage.
The Perk Lab — permanent power
Between runs, the Perk Lab converts your currencies into permanent account upgrades across eight tracks:
| TRACK | WHAT IT GROWS |
|---|---|
| Core Plating | Maximum Core health — survive more breaches |
| Power Grid | Starting Energy — build turrets sooner |
| Salvage Matrix | Salvage earned from kills and waves |
| Shard Resonator | Shards earned per run — level the free lane faster |
| Tower Command Uplink | All turret damage, all the time |
| Spell Mastery | Spell cooldown reduction |
| Draft Intelligence | Rarer, stronger cards in mid-run drafts |
| Emergency Protocol | Enemies that breach deal less Core damage |
Each track has a paid path — OMEN Standard — plus the free Shard lane. All purchases are server-authoritative and tied to your account, not your device.
OMEN path stacks with your free Shard lane. The same power applies everywhere — Tournaments, Leagues and the Monthly War included — on the identical server-issued map for every entrant. Every competitive score is server-validated either way.The Campaign — 10 warzones, free forever
The campaign spans missions across 10 warzones, each with its own districts, environments and unlock chain. Missions gate new turrets (unlocks are shown on each dock button), open new districts, and pay Shards for the Perk Lab. There is no entry cost anywhere in the campaign — it's both the game and the training ground where permanent progression fully applies.
★ Perfect Mission. Clear a mission with zero leaks and zero Core damage and it pays +50% Shards on top of the normal reward — first clear or replay — and the mission keeps a permanent ★ on its record. Same bar as the competitive Perfect Run bonus; a shielded breach still counts as a breach.
Scoring — how the big numbers actually happen
Every competitive run is scored on twelve independent components. Nothing here is hidden — this is the exact formula the game runs, and the end-of-run screen shows your run's full component-by-component recap. Read it once and you will understand why two players who both clear all forty waves can still be 25,000 points apart.
| COMPONENT | WORTH | WHAT IT REWARDS |
|---|---|---|
| Waves survived | +1,000 each | Depth. Nothing else in the formula comes close. |
| Flawless waves | +400 each | A wave where nothing reached your Core. |
| ★ Perfect run | +500 × scheduled waves | Hold every scheduled wave with zero leaks and zero Core damage — +15,000 on a 30-wave tournament, +20,000 on a 40-wave Ranked clear. One breach, even a shielded one, and it's gone. |
| Speed bonus | up to +200 per wave | +8 per second saved against a 45s-per-wave par. |
| Core HP at the end | +30 per HP | Finishing healthy. Dying scores zero here. |
| Damage dealt | +1 per 100 | Capped at 300 × wave, so you can't farm it. |
| Bosses killed | +250 each | Every RIFT COLOSSUS you put down. |
| Elites killed | +40 each | The violet-glowing ones. |
| Kills | +10 each | Volume. The smallest lever on the board. |
| Core damage taken | −25 per point | A penalty. Capped at 500 × wave, but it bites early. |
| Slow waves | up to −500 per wave | A decay. A wave keeps its full 1,000 only if you clear it within 90s (2× the 45s par). Past that its value melts linearly to a 500 floor at 180s. Turtling behind Gravity fields is no longer free — kill, don't stall. Game time only: pauses and drafts never count. |
| Boosts | +2,500 each, 8 available | Ranked only. Eight optional objectives, listed below. None of them come free with a clean run — every one asks you to give up safety for score. All eight is the maximum and it is meant to be rare. |
The eight Boosts
Ranked used to run 40 waves and then keep going in overtime, because two flawless 40-wave runs scored the same number — the damage and speed terms cap out, and on a clean clear everyone kills the same enemies. Overtime separated the field by making runs an extra half hour long. Boosts do the same job inside the original 40.
| BOOST | HOW YOU CLAIM IT | WHAT IT COSTS YOU |
|---|---|---|
| BLITZ | Finish the run in under 18 minutes. | Build time. |
| SPRINTER | Clear 20 waves in under 25s each. | You have to push, not hold. |
| RELENTLESS | No single wave takes longer than 30s. | One turtled boss wave loses it. |
| FAST HANDS | Launch 10 waves with 5s or more still on the timer. | The early-launch energy bonus you'd have banked. |
| SPELL DISCIPLINE | Clear 10 waves without casting a single spell. | Your safety net, exactly when you want it. |
| WAR CHEST | Finish holding 2,000+ Salvage. | Everything you didn't buy with it. |
| SCORCHED EARTH | Finish with under 200 Energy banked. | Your emergency reserve. Directly opposed to WAR CHEST — plan which one you're going for. |
| OVERKILL | Deal 6,000,000 damage in the run. | Nothing, if you built for damage — this is the one that pays you back for the damage the score itself caps. |
1 · Go deeper. A wave is worth 1,000 — more than 100 kills. Everything else is a tiebreak between players who reached the same depth.
2 · Never leak. A clean wave pays +400 and avoids the −25/point penalty. Leaking 20 Core damage across a run is −500 and the flawless bonuses you didn't get. On a 30-wave run, a truly perfect defence is worth ~27,000 points on its own — the flawless waves plus the ★ Perfect Run bonus.
3 · Launch early. Pressing SPACE before the timer pays up to +200 a wave. Over 60 waves that's 12,000 points for doing nothing but being decisive.
4 · Finish alive. Core HP pays 30 a point at the end. Die and you lose all of it.
Why your score can drop even when you WIN. The live number in the corner includes the speed bonus at that moment — and the speed bonus is a countdown, not a bank. It pays +8 for every second you are ahead of the 45s-per-wave par, recomputed in real time, so a long final boss fight drains it while you watch (and it drains three times as fast at 3× game speed, because the par is measured in game time). Late Core hits swing double, too: each point of damage adds −25 and takes 30 off your end-of-run Core HP bonus — one 30-damage COLOSSUS breach near the end is −1,650 on its own. Your submitted score is the formula at the moment the run actually ends; the end screen's recap shows exactly what was banked.
Why your score drops when you die. The number in the corner during a run is your live score — what you'd bank if the run ended right now. When the Core falls, two things happen at once: the Core-HP component goes to zero, and every point of damage you took is still sitting in the penalty. On a deep run that swing is easily 60,000–70,000 points. Both numbers are correct; they just measure different moments. A run you survive out of will always beat the same run you die out of.
Doctrine — the deep progression track
Doctrine is live. A second permanent-upgrade system, separate from the Perk Lab, built for players who want somewhere to keep going. Where the Perk Lab tunes the stats you already know, Doctrine adds capability the game doesn't otherwise have — critical hits, chaining shots, a fourth draft card, a seventh Mk level. Ten disciplines, each with its own deep ladder.
| DISCIPLINE | WHAT IT GROWS |
|---|---|
| Cadence | Turret fire rate |
| Optics | Turret range |
| Ballistics | Projectile speed and splash radius |
| Overload | Critical hits — a chance for any turret to hit far harder |
| Conduction | Chaining and piercing — shots that carry to extra targets |
| Lattice | Cheaper construction, extra buildable plating |
| Foundry | Cheaper upgrades, and eventually a seventh Mk level |
| Interdiction | Slow and stun effectiveness |
| Requisition | A fourth draft card and extra rerolls |
| Vigil | Deeper wave preview, stronger Second Wind |
Each discipline runs a 20-rank lane — the same model as the Perk Lab: the OMEN Standard lane. Every rank is a fraction of a percent, so the power comes from ten disciplines compounding rather than any single purchase. No rank ever costs more than the platform's per-purchase ceiling — the deepest rank sits at $24.
Disciplines unlock as you clear the campaign: each one opens at its matching warzone — Cadence at Warzone 1, Optics at Warzone 2, all the way to Vigil at Warzone 10 — so a fresh account can't buy its way past the game. You earn Standard-lane ranks free from Reward Packs dropped by warzone bosses (below), and you can also buy ranks in the lane directly with OMEN.
The Daily Siege — fifteen seconds a day
Once per day you get a Daily Siege: a fifteen-second assault where you mash to launch and the damage you do decides the reward. There is no wheel and no spin: the daily is something you play, not something that happens to you. Destroy the target outright and it rolls a Reward Pack on top of the reward.
Quests
Alongside the siege, daily quests credit automatically as you play — no claim button, no missed window. They pay OMEN VIP Points. Weekly quest claims are currently queued portal-side: nothing is lost, and parked claims pay out once the portal assignment clears.
Reward Packs — the free lane, sealed
As you push through the campaign you earn Reward Packs — sealed containers that open into permanent power. A single campaign hands out about 25 packs, and which family you get depends on where you earned it:
| FAMILY | EARNED FROM | WHAT'S INSIDE |
|---|---|---|
| Perk | District cores, as you clear them | A level in one of the eight Perk Lab families |
| Spell | Campaign milestone clears | A level in one of the six battle spells |
| Doctrine | Warzone boss drops | A Doctrine rank in one of the ten disciplines |
Warzone bosses are the wildcard: a boss pack rolls its family — perk, spell or doctrine — when it lands, so any boss can hand you any of the three. Cores and milestones stay fixed.
Every pack comes in one of five tiers — Standard, Rare, Elite, Prime and Rift. Higher tiers roll more grants at once and lean harder toward high-end levels. Each tier has a published price — 30 / 60 / 110 / 170 / 240 — but through the campaign you earn them for nothing. The full odds for every tier are published on the pack's odds screen in-game: the exact table the server rolls against, so what you see is what you get.
1 · No dead packs. Every pack grants at least one level you haven't maxed — it can never open into nothing.
2 · Duplicates still pay. Roll a level you already own and it converts to Shards instead, so an opened pack is never a zero.
3 · Pity at ten. Ten packs without a top-band grant and the next one is forced to roll high — a cold streak can't run forever.
OMEN PACKS tab (STANDARD, RARE and ELITE singles). A pack opens at exactly the tier on the label. Every pack is rolled and recorded server-side against the same published odds, whether you earned it or bought it.Ranked Campaign — the weekly ladder
- Free to enter. Seasons run weekly; everyone plays the same server-issued Bastion.
- Your best run each day is added to your season total — consistency climbs the board, not one lucky spike. You get 3 free scored runs every day and there is nothing to buy; the runs you have left today are shown on the ranked card in-game, and the budget resets at 00:00 UTC.
- The account-power league: your permanent Perk Lab upgrades (and in-run purchases) apply here — ranked measures the strongest Bastion your account can field. Everyone still plays the identical server-issued map and seed.
- Free practice: take a practice run on the exact ranked Bastion first — nothing charged, no score submitted.
- When a run ends, your score is validated and banked server-side. Interrupted runs resume where they left off.
- Ladders pay the top of the board in prize currency when the season settles.
Tournaments — OMEN
- Run on daily, weekly and monthly cadences in OMEN, across stake divisions.
- Your account comes with you: permanent perks, Doctrine and in-run purchases apply in tournaments exactly as they do in Ranked — everyone still plays the identical server-issued run.
- Entry fee and full payout structure are shown before you enter. Your best score during the window ranks.
- Want another shot? Re-entry is offered at a reduced fee, with attempt limits displayed up front.
- At close, the event locks, ranks and settles automatically — no waiting on a human to declare winners.
- Same fairness engine as ranked: server-issued seeds, server-validated scores.
Leagues — the paid weekly track
Three leagues, each longer and harder than the last, each on its own map. They are the campaign for players who have outgrown Ranked: everything you have built counts, the price is real, and the week is yours once you are in.
- Veteran League — 250 a week. 60 waves on Iron Meridian (22 rings), enemy HP ×1.4, one map hazard, Tier 2 from wave 10.
- Elite League — 1,000 a week. 80 waves on Null Cathedral (25 rings), enemy HP ×1.8, two hazards at once, Tier 2 from wave 5.
- Apocalypse League — 5,000 a week. 100 waves on Oblivion Crown (25 rings), enemy HP ×2.2, all three hazards, every Tier 2 archetype from wave 1, and no draft rerolls — your pick of three is the only draw.
- Pay once, play the week: Veteran buys 21 scored runs across the week; Elite buys 2 a day (14); Apocalypse 1 a day (7) — daily runs reset at 00:00 UTC. Your top score is your rank. There is no re-entry — and no revives, as in every scored mode.
- Uncapped scoring: in leagues the damage-dealt and speed components have no ceiling, and a LEAGUE DEPTH row pays 20 more for every wave than the wave before it (wave n is worth 1,000 + 20·(n−1)) — deep survival on a 100-wave map separates the field far more than kill counts. Core-damage penalties keep their floor.
- Permanent power counts — Perk Lab, Doctrine and in-run OMEN purchases all apply, exactly as in the Ranked Campaign.
- The pool is yours to grow: entry fees and every OMEN spent during a league run land in that league's own weekly pool, which pays the top 10 on the tournament split when the week closes.
- Entries above the single-purchase limit (Elite, Apocalypse) are charged as a sequence of fixed-price units after you confirm the total — nothing is registered until the full amount is paid.
- Hazards rotate every week and are named on the league card before you enter; the run briefing names them again on deploy.
The Bastion VIP Pass — a standing discount you own
The VIP Pass is an NFT you hold in your own wallet that lowers what you pay in OMENX for as long as you hold it. Five tiers, each with a deeper discount:
| TIER | DISCOUNT |
|---|---|
| Standard | 5% |
| Rare | 8% |
| Epic | 12% |
| Legendary | 18% |
| Mythic | 25% |
What it discounts — and what it does not
The discount applies to permanent upgrades, the Perk Lab, Doctrine, the Tower Arsenal, Reward Packs and cosmetics — the things you buy to get stronger.
It follows the pass, not the account
The benefit is attached to the token. Sell or send a pass and the discount goes with it — which is also why a pass is worth something to somebody else. Only your highest tier counts; passes never stack.
The tier is final
A pass never changes tier. There is no upgrade, merge or burn — what you draw is what it stays. Packs are opened by the OMEN platform, not by Last Bastion, against drop rates published in full. There is no Mythic pack at any price: the draw is the only thing that makes one.
See the tiers, the packs and the exact published drop rates →
Prizes, payouts & trust
- Winners are paid in the competition's own currency — OMEN events pay — once the event locks and settles.
- OMEN payouts are delivered on-chain to your OMEN account, visible in your history with the transaction record.
- Client scores never settle money. Only server-validated runs rank or pay.
- Your balances, entries and payout history are always readable in-game from authenticated server records.
- Staff cannot win anything. Staff wallets — the owner's included — are labelled STAFF on every board and are ineligible for prizes across tournaments, the Ranked Campaign, the Monthly War and community giveaways. In tournaments and Ranked, the share a staff account would have won is redistributed to the other ranked players. In giveaways, staff are removed from the field before the shuffle, and the payout rail refuses a staff wallet even if a draw somehow reached it. The rules page spells out the mechanism, including a dated note about the period when this covered competitions but not giveaways.
Controls
| INPUT | ACTION |
|---|---|
| 1–5 | Select a turret class to place |
| Click plating | Build the selected turret |
| Shift + click | Place several turrets in a row |
| Click a turret | Upgrade · change targeting (first / strongest / closest) · salvage |
| Q W E | Cast equipped spells 1 / 2 / 3 |
| SPACE | Launch the next wave |
| Scroll / pinch | Zoom the battlefield (auto-fit keeps the full Bastion in view) |
Fully playable on desktop and mobile — same account, same progress.